Introduction to Sod Installation
Sod installation is the process of laying pre-grown grass turf directly onto prepared soil to create an instant, lush lawn. Unlike seeding, which can take weeks or months to establish, sod provides immediate results, making it a popular choice for homeowners, landscapers, and commercial properties seeking quick green spaces. This method is ideal for areas needing rapid coverage, such as new constructions, eroded yards, or events requiring instant aesthetics.
The benefits of sod include erosion control, weed suppression, and a uniform appearance. However, success depends on proper preparation, selection, and maintenance. This guide will walk you through the entire process, from planning to aftercare, ensuring your sod installation yields a thriving lawn.
Preparing the Site for Sod
Proper site preparation is crucial for sod’s long-term health. Begin by assessing the area: measure the space, check for drainage issues, and remove any obstacles like rocks, roots, or debris. Sod thrives in well-drained soil with a pH between 6.0 and 7.0; test your soil using a kit from a garden center.
Soil Testing and Amendment
Conduct a soil test to identify deficiencies. Amend the soil by tilling in organic matter like compost to improve fertility and structure. If the soil is clay-heavy, add sand or gypsum to enhance drainage. Avoid over-fertilizing at this stage, as sod comes with nutrients.
Grading and Leveling
Grade the area to ensure even water flow—aim for a slight slope (1-2% grade) away from structures to prevent water pooling. Use a string line and stakes to mark levels. Remove existing grass, weeds, or vegetation by hand or with a sod cutter. For weed control, apply a non-selective herbicide like glyphosate 1-2 weeks before installation, allowing time for it to break down.
Irrigation Setup
Install a sprinkler system or plan for manual watering. Sod needs consistent moisture, so ensure access to water sources. Lay irrigation lines before sodding to avoid damaging them later.
Choosing the Right Sod
Sod varieties vary by climate, soil type, and intended use. Common types include:
- Bermuda Grass: Drought-tolerant, ideal for warm climates; thrives in full sun.
- Fescue: Shade-tolerant, suitable for cooler regions; forms a dense, green turf.
- Kentucky Bluegrass: Hardy in northern areas; excellent for high-traffic lawns.
- Zoysia: Low-maintenance, resistant to wear; good for coastal or sandy soils.
Select sod from a reputable supplier, ensuring it’s fresh (cut within 24-48 hours) and free of weeds or diseases. Calculate the amount needed: measure the area in square feet and add 5-10% for waste. For a 1,000 sq ft lawn, order about 1,100 sq ft of sod.
Step-by-Step Sod Installation Process
With preparation complete, follow these steps for installation. Work in sections to prevent the sod from drying out, and aim to install on a cool, cloudy day to minimize stress.
Step 1: Water the Soil
Lightly water the prepared soil 24 hours before laying sod. It should be moist but not soggy—think of a wrung-out sponge. This helps the roots establish contact.
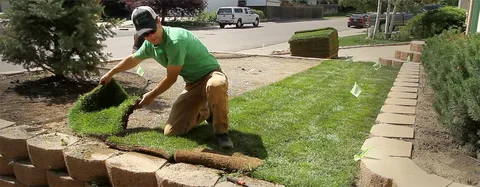
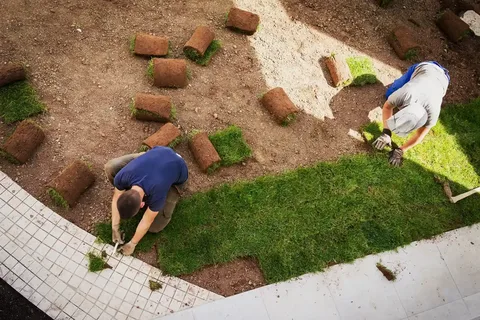
Step 2: Lay the First Row
Start at a straight edge, like a driveway or walkway, to ensure alignment. Unroll the sod like carpet, staggering seams like bricks to avoid long straight lines. Press it firmly into the soil, ensuring no air pockets. Use a roller or your feet to secure it.
Step 3: Continue Laying Rows
Lay subsequent rows, butting edges tightly without overlapping. Trim edges with a sharp knife or sod cutter for curves. Avoid walking on installed sod; use planks to distribute weight.
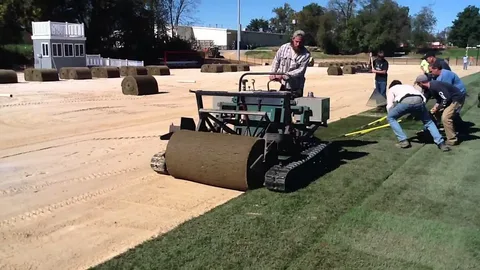
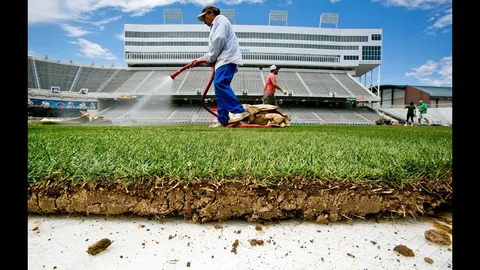
Step 4: Secure and Water Immediately
Once laid, roll the entire area with a lawn roller to eliminate air gaps and promote root-soil contact. Water thoroughly—about 1 inch deep—to settle the sod. Continue watering daily for the first 10-14 days, keeping the soil moist but not waterlogged.
Step 5: Fertilize and Edge
Apply a starter fertilizer high in phosphorus to encourage root growth. Edge the lawn with a spade or edger to separate it from borders, preventing grass encroachment.
Post-Installation Care and Maintenance
Sod requires attentive care in the first few weeks to establish roots. Water deeply but infrequently—aim for 1-2 inches per week, adjusting for rainfall. Mowing can begin once the grass reaches 3-4 inches tall, using a sharp blade set high.
Fertilize every 4-6 weeks during the growing season with a balanced fertilizer. Control weeds manually or with selective herbicides. Aerate annually to improve soil health, and overseed in fall for thicker turf.
Monitor for pests like grubs; treat with organic options if needed. In winter, avoid heavy traffic to prevent damage.
Common Mistakes to Avoid
Even experienced installers can err. Overwatering leads to root rot, while underwatering causes wilting. Laying sod on unprepared soil results in uneven settling. Choosing the wrong grass type for your climate invites failure. Rushing installation without rolling can create air pockets, leading to dead spots.
Conclusion
Sod installation offers a fast track to a beautiful lawn, but it demands diligence. By preparing the site meticulously, selecting quality sod, and following installation steps, you’ll enjoy a vibrant yard. With proper care, your sod can last decades, providing a green oasis for relaxation and recreation. If you’re unsure, consult a local landscaper for tailored advice. Happy sodding!