Sod installation is a popular choice for homeowners and landscapers seeking an instant, lush green lawn without the months-long wait of seeding. Whether you’re revamping your backyard, repairing patchy grass, or starting a new landscape project, installing sod can provide immediate results. This comprehensive guide will walk you through the entire process, from preparation to aftercare, ensuring your sod takes root successfully. By following these steps, you’ll achieve a vibrant, healthy lawn that enhances your property’s curb appeal.
Why Choose Sod Over Seeding?
Before diving into installation, it’s worth understanding why sod is often preferred over traditional seeding. Sod, also known as turfgrass, consists of pre-grown grass with its root system intact, allowing it to establish quickly. Unlike seeds, which can take weeks to germinate and months to mature, sod provides instant coverage and stability. It’s ideal for areas needing immediate use, such as new construction sites or event spaces.
Benefits include:
- Instant Gratification: A fully grown lawn in days, not months.
- Erosion Control: The dense root network prevents soil erosion.
- Weed Suppression: Sod outcompetes weeds, reducing maintenance.
- Variety: Options range from cool-season grasses like Kentucky bluegrass to warm-season types like Bermuda, suited to different climates.
However, sod can be more expensive upfront than seed, and it requires proper installation to avoid issues like root rot or uneven growth. With the right technique, the investment pays off in a low-maintenance lawn.
Preparing Your Site for Sod Installation
Proper preparation is the foundation of successful sod installation. Skipping this step can lead to poor root establishment, disease, and wasted effort. Start by assessing your site and gathering materials.
Tools and Materials Needed
- Sod (calculate based on square footage; buy 5-10% extra for cuts and waste).
- Topsoil or compost (if needed for leveling).
- Starter fertilizer (high in phosphorus for root development).
- Soil test kit (to check pH and nutrient levels).
- Tools: Shovel, rake, lawn roller, utility knife, wheelbarrow, and a sod cutter if installing over existing grass.
- Water source for irrigation.
Step-by-Step Site Preparation
- Clear the Area: Remove debris, rocks, weeds, and existing grass. For best results, use a sod cutter to strip old turf, or apply a non-selective herbicide like glyphosate 2-4 weeks in advance to kill vegetation. Avoid tilling deeply, as it can disrupt soil structure.
- Test and Amend the Soil: Conduct a soil test to determine pH (ideal range: 6.0-7.0 for most grasses) and nutrient deficiencies. Amend with lime to raise pH or sulfur to lower it. Add compost or topsoil if the soil is poor or compacted. Aim for 4-6 inches of fertile topsoil.
- Grade and Level the Ground: Use a rake or tiller to break up compacted soil. Create a gentle slope (1-2% grade) away from structures to ensure drainage. Fill low spots with topsoil and remove excess from high areas. The goal is a smooth, even surface to prevent water pooling.
- Irrigate the Soil: Water the prepared area deeply 1-2 days before installation to settle the soil and ensure it’s moist but not soggy. This helps the sod roots make contact with the ground.
Timing is crucial: Install sod in cooler weather, ideally in early spring or fall, when temperatures are moderate (50-75°F). Avoid hot, dry summers or freezing winters, as extreme conditions stress the grass.
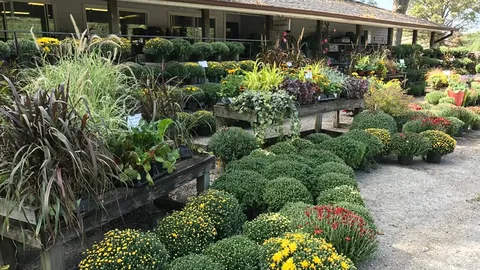
Choosing the Right Sod
Not all sod is created equal. Select a variety that matches your climate, soil type, and intended use. Popular options include:
- Kentucky Bluegrass: Durable, fine-textured; best for northern climates.
- Bermuda Grass: Tough, heat-tolerant; ideal for southern regions.
- Fescue: Shade-tolerant and low-maintenance; good for partial sun areas.
- Zoysia: Dense and slow-growing; excellent for high-traffic lawns.
Buy fresh sod from a reputable supplier, delivered on the day of installation. Check for healthy, green blades, firm roots, and no signs of disease or weeds. If possible, visit the sod farm to inspect quality.
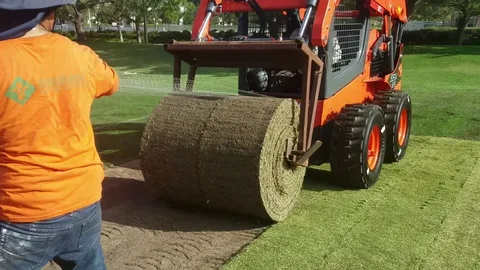
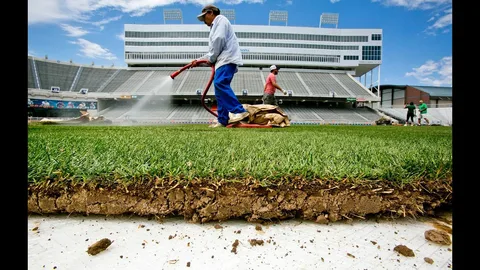
Step-by-Step Sod Installation Guide
With your site prepped and sod selected, it’s time to lay it down. Work in sections to avoid drying out the sod.
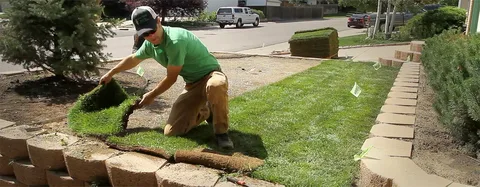
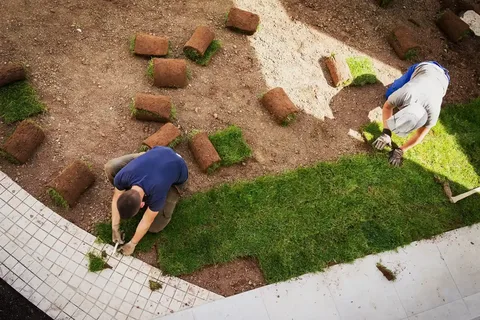
- Lay the First Row: Start along a straight edge, like a driveway or walkway, to ensure alignment. Unroll the sod like carpet, keeping it tight against the previous piece. Stagger seams like bricks to prevent visible lines and improve stability.
- Trim and Fit: Use a utility knife to cut sod around obstacles, such as trees or flower beds. Butt edges tightly without overlapping, as gaps can lead to drying or weed invasion.
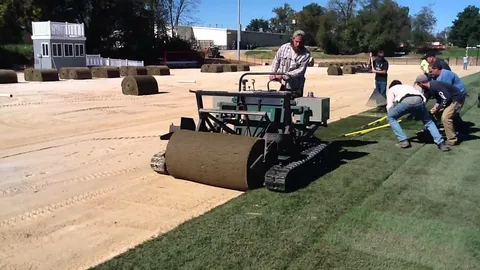
- Press It Down: After laying each piece, firmly press it into the soil with your hands or feet. For larger areas, use a lawn roller to ensure good soil-to-root contact. This prevents air pockets that could kill roots.
- Apply Starter Fertilizer: Sprinkle a starter fertilizer over the laid sod according to package instructions. Water lightly to activate it.
- Water Immediately: Soak the new sod thoroughly (about 1 inch of water) right after installation. The soil beneath should be moist to the touch. Continue watering daily for the first 1-2 weeks to keep the roots hydrated.
Aim to complete installation in one day to minimize stress on the sod. If you must stop, cover unfinished areas with wet burlap to prevent drying.
Aftercare and Maintenance for New Sod
The first few weeks are critical for root establishment. Proper aftercare ensures your lawn thrives.
Watering Schedule
- Days 1-7: Water 2-3 times daily for 10-15 minutes each session to keep the top 6 inches moist.
- Weeks 2-4: Reduce to once daily, then every other day as roots deepen.
- After 4 weeks: Transition to normal lawn watering (1-2 inches per week, depending on climate).
Use a sprinkler or soaker hose for even distribution. Avoid overwatering, which can cause fungal diseases.
Mowing and Fertilizing
- Wait 2-3 weeks before the first mow, setting the blade high (3-4 inches) to avoid scalping.
- Fertilize every 4-6 weeks with a balanced lawn fertilizer. Test soil annually to adjust.
Pest and Weed Control
Monitor for pests like grubs or weeds. Use organic or chemical treatments as needed, but avoid herbicides on new sod for at least 4-6 months.
Common Mistakes to Avoid
Even experienced installers can err. Here are pitfalls to sidestep:
- Poor Drainage: Ensure proper grading to prevent waterlogging, which leads to root rot.
- Uneven Soil: Leveling issues cause bumps and dips, making mowing difficult.
- Dry Sod: Never let sod dry out; it can die in hours.
- Wrong Timing: Installing in extreme heat or cold increases failure risk.
- Overlapping or Gapping: This creates weak spots prone to weeds and uneven growth.
If problems arise, like yellowing grass, it often indicates watering issues or nutrient deficiencies. Consult a local extension service for advice.
Conclusion: Enjoy Your Instant Lawn
Sod installation offers a fast track to a beautiful, functional lawn, but success hinges on meticulous preparation and care. By choosing the right sod, prepping your site thoroughly, and following installation and maintenance guidelines, you’ll enjoy a lush green space that lasts for years. Remember, a well-installed lawn not only boosts property value but also provides a serene outdoor area for relaxation and recreation. If you’re unsure about any step, consider hiring a professional landscaper to ensure perfection. With patience and attention, your sod will transform your yard into an envy-worthy oasis.